Sometimes you need to do some work on a live site that might break the layout or functionality.
You should always test any changes on a staging site, but eventually the changes will make their way to the live site.
The standard practice is to put the website into maintenance mode while you make the changes.
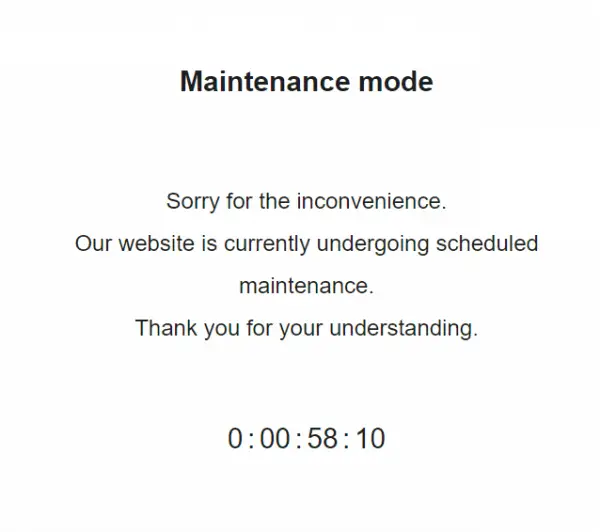
The website will look the same to you, but to people not logged in, your website will look something like this:
It's a good idea to check your analytics and make these changes during a quieter period.
It's also a great idea to give people a sense of how long they might need to wait before the site is back. That's why we use a countdown timer.
How to put a site into maintenance mode with a countdown timer:
- Install & activate the WP Maintenance Mode plugin by Designmodo
- Set the countdown module timer and turn it on
- Activate Maintenance Mode.
Let's go through those steps in detail.
Install & Activate the WP Maintenance Mode Plugin
There are many maintenance mode plugins around, but the one that I've used for many years is WP Maintance Mode by Designmodo. It has everything I need, is lightweight and stable.
I've tried other plugins, but they're just not as suited to what I need.
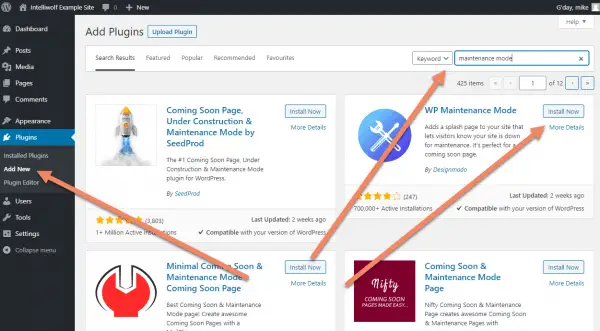
Go to Plugins -> Add New in the WordPress admin area.
Search for "maintenance mode". Click "Install Now" next to the one by Designmodo.
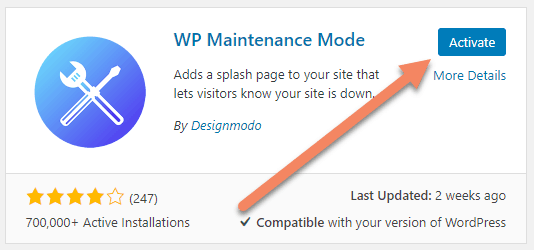
Once WP Maintenance Mode is installed, click "Activate".
Set the Countdown Timer
The next step is to set the countdown timer.
This won't turn maintenance mode on just yet, it's just a configuration step.
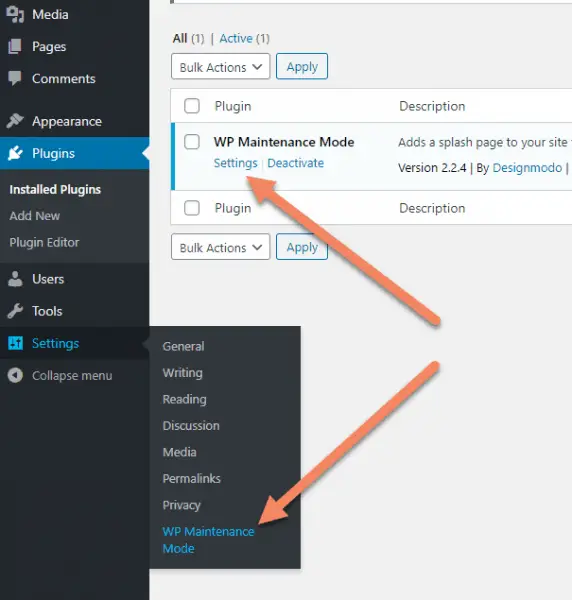
Go to the WP Maintenance Mode settings either through the Installed Plugins page or find it under Settings -> WP Maintenance Mode in the sidebar of the WordPress admin area.
Skip over to the Modules tab and look for Countdown.
Set the Countdown (remaining time) for how long you expect to need to make the changes. Try to be reasonably accurate, but it's better to overestimate the length of time you'll need.
Note: if the timer runs out, maintenance mode will not deactivate. The timer will just be "stuck" at 0:00:00:00.
Change the Show countdown dropdown to "Yes".
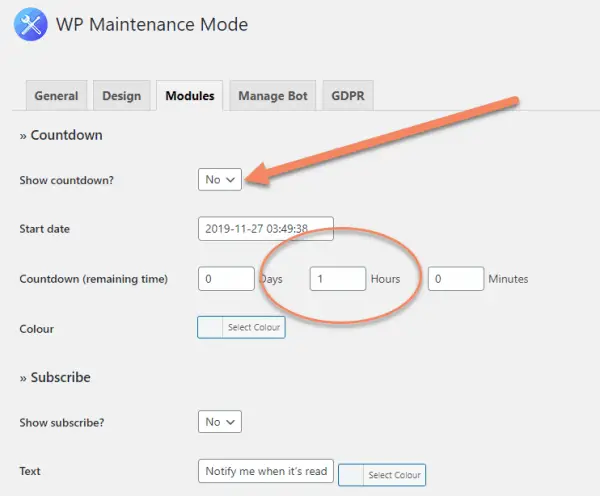
Set the Start date. This is the time from which the remaining time in the previous step is calculated.
I usually just click "Now".
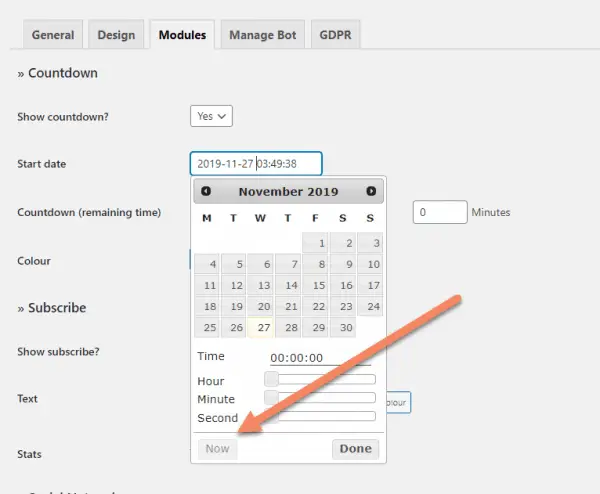
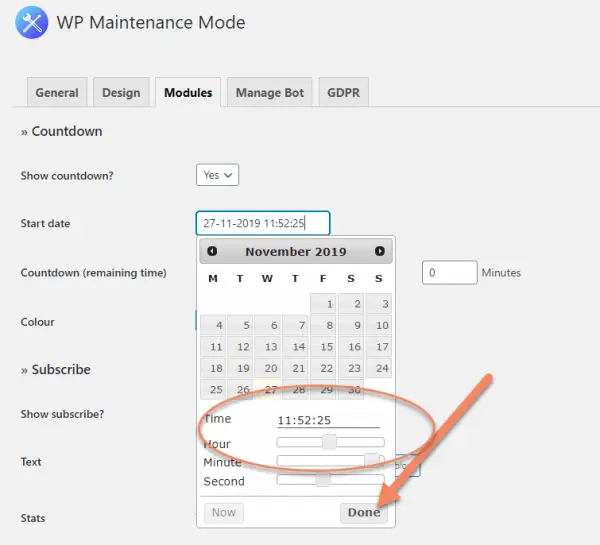
You'll see the time (and date if you've used this before on the site) change to the current time.
Click "Done".
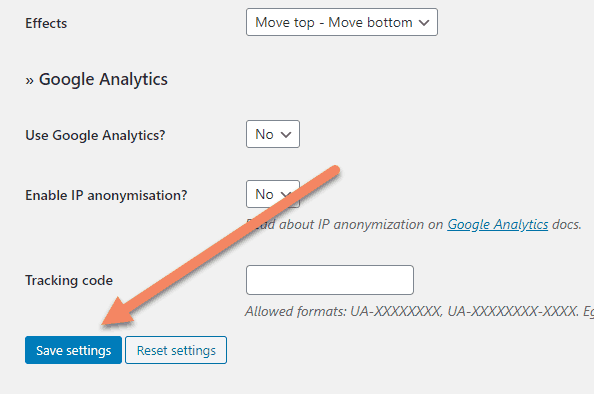
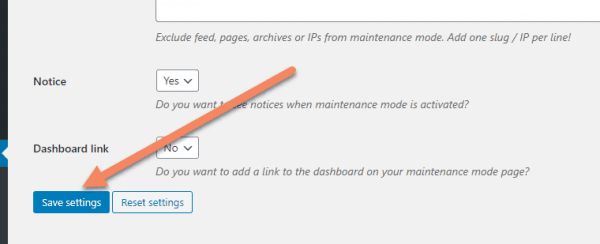
Scroll to the bottom and click "Save settings".
Activate Maintenance Mode
You can play with the design if you like, or change the words. That's all done in the Design tab.
When you're ready to turn maintenance mode on and start making those changes to the website, go to the General tab and change the Status from "Deactivated" to "Activated".
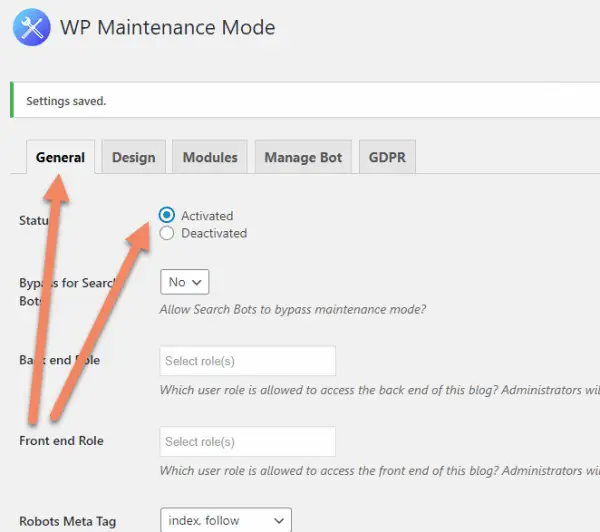
Scroll to the bottom of the page and click "Save Settings".
Congratulations, Maintenance Mode is now active.
If you go to the website in a browser where you're not logged in, you'll see a message that looks like this:

However, when you're signed in, you'll see the website as it normally is:

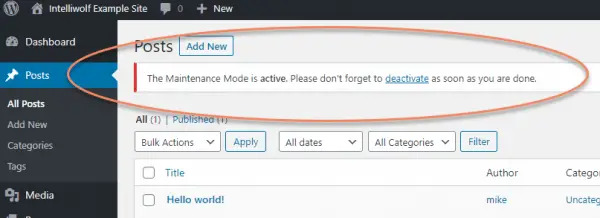
There's also a helpful nag across the admin area of the site reminding you not to forget to deactivate maintenance mode when you're finished making the changes.
How to Deactivate Maintenance Mode
Deactivating maintenance mode is as simple as going back to the WP Maintenance Mode settings (Settings -> WP Maintance Mode) and under the General tab changing the Status from "Activated" to "Deactivated". Be sure to scroll to the bottom and click "Save changes".
It's also a good idea to go to Plugins and deactivate WP Maintenance Mode. The website won't break if you forget this step, but it's good practice to deactivate any plugins that you're not currently using.
There's no need to delete WP Maintenance Mode. You can just keep it installed and inactive until the next time you need to make changes to the live website.

