Countdown timers are very useful on things like sales pages or event listings. Most of the decent page builders have great looking countdown timers, but sometimes you just want something that looks a specific way and does exactly what you need.
Fortunately it's pretty easy to create a countdown timer in WordPress without a plugin:
- Create a shortcode that takes attributes
- Convert the string time from the attributes to a usable time format
- Split the time into segments
- Style and echo the result
- Add the shortcode, passing in the time you're counting down to as a shortcode attribute
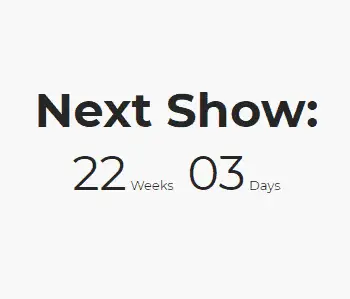
This is basically what we're creating:
Here's the full code you'll need:
/*** Countdown Timer Shortcode ***/
function next_event_shortcodes_init() {
  add_shortcode('next_event', 'next_event_shortcode');
}
add_action('init', 'next_event_shortcodes_init');

function next_event_shortcode ($atts = [])
{
  // normalize attribute keys to lowercase
  $atts = array_change_key_case((array)$atts, CASE_LOWER);
  if (!array_key_exists("date", $atts)) return false;

  $time_remaining = strtotime($atts['date']) - time();

  if ($time_remaining < 0) {
    $time_remaining = 0;
  }

  $total_days_remaining = ceil($time_remaining / (60 * 60 * 24));

  if ($total_days_remaining >= 7) {
    $weeks_remaining = sprintf("%02d", floor($total_days_remaining / 7));
    $days_remaining = sprintf("%02d", $total_days_remaining % 7);
  } else {
    $weeks_remaining = sprintf("%02d", 0);
    $days_remaining = sprintf("%02d", $total_days_remaining);
  }

  echo "
  <div class='next-event'>
    $weeks_remaining Weeks, $days_remaining Days
  </div>";
}
The shortcode you need looks like this:
[next_event date="1 July 2019"]Create a shortcode that takes attributes
The first function hooks into the init hook. This just makes sure it doesn't fire off too soon.
If you've already got a function hooking into init, then just add this line to that function:
add_shortcode('next_event', 'next_event_shortcode');Otherwise, add the whole function with the hook:
function next_event_shortcodes_init() {
  add_shortcode('next_event', 'next_event_shortcode');
}
add_action('init', 'next_event_shortcodes_init');
The setup of the shortcode function is what allows you to add an attribute.
function next_event_shortcode ($atts = []) {}In our example, that attribute will be the date, as a string. The date will be passed in as $atts['date']. The form of the date doesn't really matter, as we'll explain when it comes time to add the shortcode.
NOTE: For this example, we're just passing in a date. All we care about is weeks and days. You can use this exact format for a date and time; you just have to split the time segments accordingly.
In the next three lines, we do some case normalization and error checking, just to make sure the person implementing the shortcode didn't make a mistake:
// normalize attribute keys to lowercase
$atts = array_change_key_case((array)$atts, CASE_LOWER);
if (!array_key_exists("date", $atts)) return false;
The second line there converts the attribute, just in case the author wrote "Date", instead of "date".
In the third line, we make sure they remembered to give us a date.
Convert the string time from the attributes to a usable time format
As mentioned above, all we're getting is a string of the date.
Using the magic of PHP, we can convert the string to a usable time format with strtotime($atts['date']).
To figure out how much time is left between when the visitor visits the page and the event occurs, we use this code:
$time_remaining = strtotime($atts['date']) - time();As you can probably gather from that line, time() is a PHP function that simply gets "now".
time() essentially returns the number of seconds between 1 January 1970 00:00 GMT and the present
http://php.net/manual/en/function.time.php
The visitor might see the page after the date of the event. We don't want to show them negative time, so we add this next:
if ($time_remaining < 0) {
  $time_remaining = 0;
}
That will show them 0 Weeks, 0 Days.
Split the time into segments
First we want to calculate the total number of days between "now" and the event:
$total_days_remaining = ceil($time_remaining / (60 * 60 * 24));The (60 * 60 * 24) is because $time_remaining is in seconds. We need to convert it into days.
We use ceil() to round the fraction up to the nearest whole number. That way, if the event is tomorrow, it will show as one day remaining.
Next we split the days into weeks and days, if there are more than 7 days remaining, or just into days, if there are fewer.
if ($total_days_remaining >= 7) {
  $weeks_remaining = sprintf("%02d", floor($total_days_remaining / 7));
  $days_remaining = sprintf("%02d", $total_days_remaining % 7);
} else {
  $weeks_remaining = sprintf("%02d", 0);
  $days_remaining = sprintf("%02d", $total_days_remaining);
}
Under $weeks_remaining, notice we use floor() after calculating how many weeks are left. This will round the result down to the nearest whole number. That way, it won't say there are two weeks and one day remaining if there are only eight days left.
We use sprintf("%02d", $total_days_remaining) to turn the number returned from the calculations into a string. %02d is the format for numbers like 03, rather than 3. If you prefer it to be like the latter, you'd use "%d".
Style and echo the result
Finally, we echo the result, formatted the way we want:
echo "<div class='next-event'>
    $weeks_remaining Weeks, $days_remaining Days
  </div>";
This is the html that will actually be outputted to the front end.
If you want to get the look from the example at the top of this tutorial, you can wrap the variables in <span> tags, formatting them to be larger.
Notice that the whole thing is wrapped in double quotation marks. That's what allows us to use html and input the variables directly.
Add the shortcode, passing in the time you're counting down to as a shortcode attribute
Finally, we add this shortcode wherever we need it to display:
[next_event date="1 July 2019"]The next_event is set in add_shortcode().
If you want to use something other than date="", then make sure you change the references to !array_key_exists("date", $atts) and $atts['date'] in the next_event_shortcode function.
The beauty of doing it this way is that you can use whatever format of date works for you.
Some formats you can use:
- m/d/y (American style)
- d-m-y (everyone else)
- 1 July 2019
- 1 Jul 19
- Jul 1, 2019
- 2019-07-01
Notice that if you want to use the American style m/d/y, you need to use slashes (/) in between, not hyphens (-). This is how the system differentiates something like 1/7/19 (7 January) from 1-7-19 (1 July). See the strtotime() notes for more discussion on this.
I hope you've found this tutorial useful. This won't animate the countdown like some of the fancier versions, but every time a visitor refreshes or visits the page, they will see the correct number of days til the event.

Interesting post and not sure why nobody has commented on this.. Seems very useful for WordPress. Would you know how to make this a daily timer? For example count every day till a certain time.
I would like to use it for a delivery-timer countdown.
So order in ....hours and get your product tomorrow.
Not sure why nobody has commented on this either! As you say, including hours and seconds remaining would be useful too (easily done based on the above code)...