Sometimes we need to make small changes to a file on a server. It's quick and easy to just pull up cPanel and make our changes there.
We also have a tutorial on editing files through FTP if you prefer to do it that way.
How to edit files in cPanel
- Login to cPanel
- Go to File Manager
- Click on the file you want to edit, then click "Edit"
- Make any changes
- Click "Save Changes", wait for it to save, then click "Close".
Let's go through those steps in detail.
Login to cPanel. This will often be something like https://yourdomain.com/cpanel or https://yourdomain.com:2083
You should get a login screen that looks a bit like this:
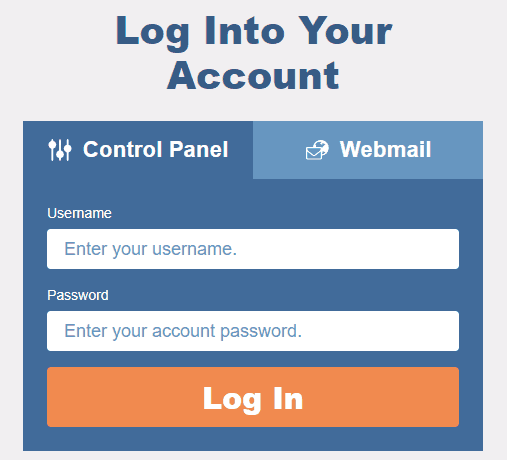
Once you've entered your cPanel login (remember this will be different from your WordPress login details) you'll get to the control panel.
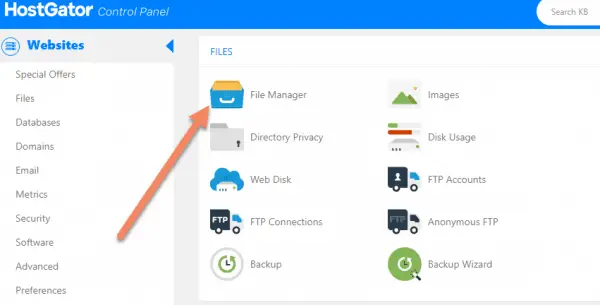
There are a couple of themes, so yours might look like this:
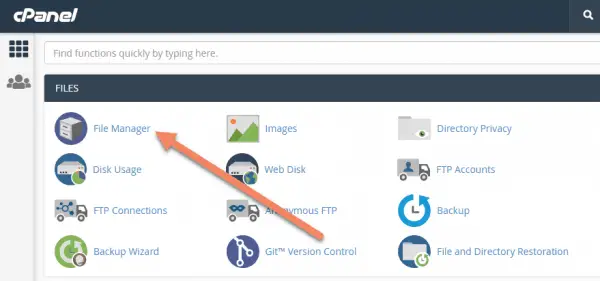
or this:
Or something else.
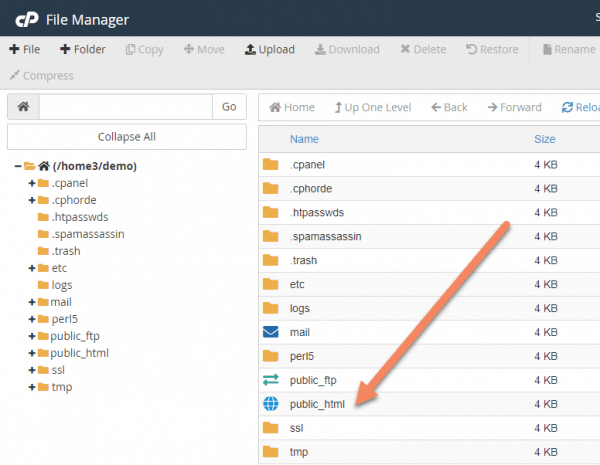
The order inside cPanel might be different too. But somewhere in there will be "File Manager". Click that.
That will bring you to the File Manager page.
Each server is setup differently, so you may see your public folder immediately, or you might need to open the public folder. This will usually be called "public_html" or the name of your domain, depending on your setup.
This functions pretty much exactly the same as the file and folder structure on your computer.
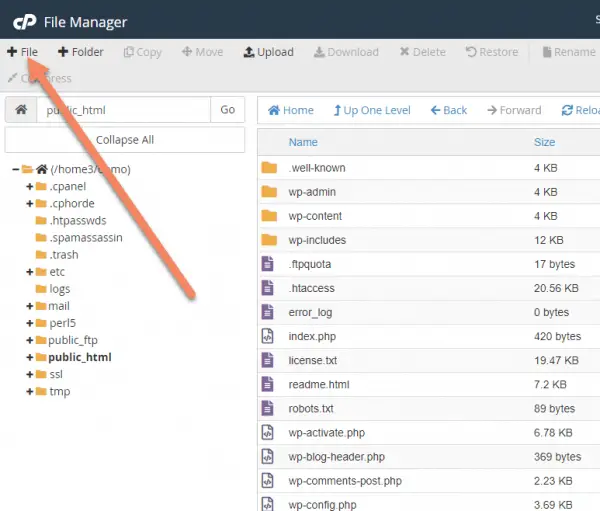
To show you the main editing features, let's add a file called, "example.html", add some html, save it, then delete it.
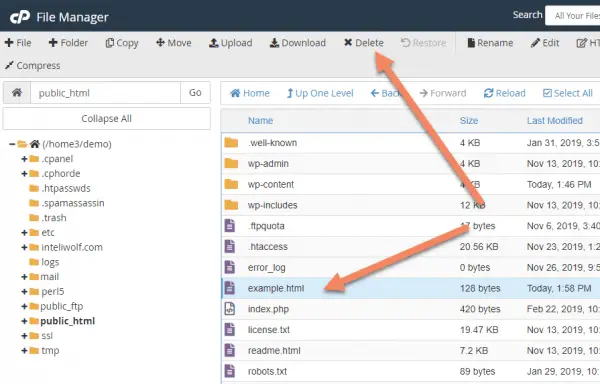
When you're in the public folder, click "File".
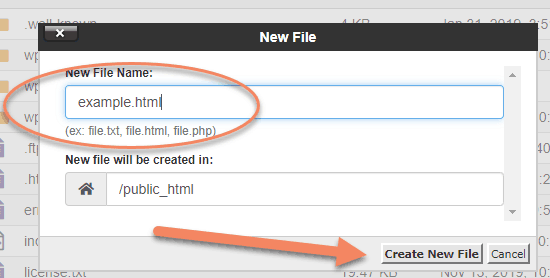
That will bring up a dialogue box. Put the name of your file in the box as shown, then click "Create New File".
This will create a blank file with the name you entered.
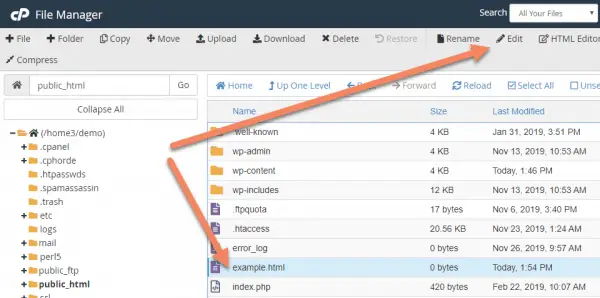
To edit this file, make sure the file is highlighted, then click "Edit" in the top bar.
You'll come to the editing page, which looks like this.
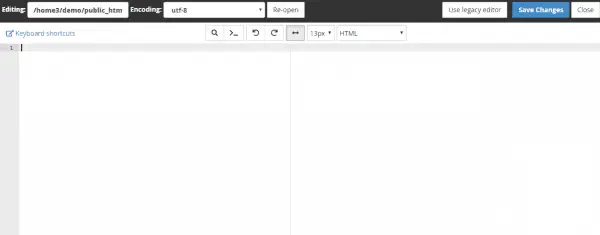
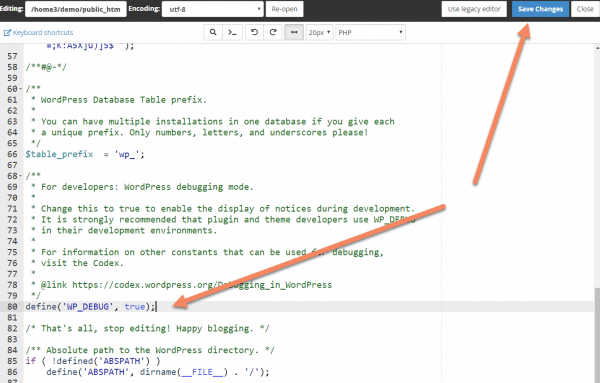
When you've added what you want to the file, click "Save Changes".

And finally, to delete the file, make sure it's highlighted and press "Delete".
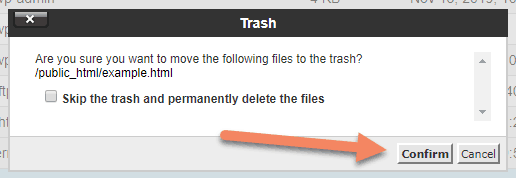
You'll get a dialogue box asking if you're sure you really do want to delete the file.
I usually check the "Skip the trash and permanently delete the files" box.
Click "Confirm" and the file will be deleted.
You can delete multiple files at a time by holding CTRL and clicking.
How to edit wp-config.php in cPanel
One of the most common files that WordPress website owners will edit in cPanel is wp-config.php, particularly to turn on and off debug mode.
How to edit wp-config.php in cPanel:
- Login to cPanel
- Open File Manager
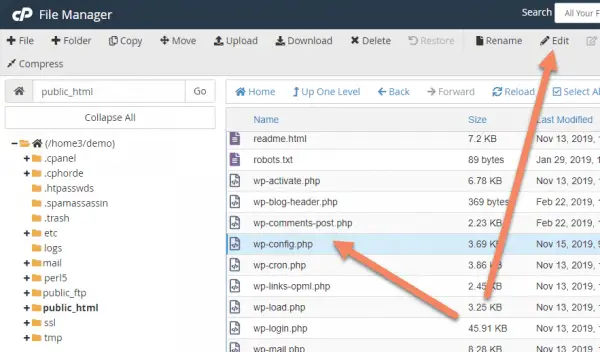
- Click on wp-config.php
- Click "Edit"
- Make your changes
- Click "Save Changes" and close the window.
You'll find the debug line almost at the bottom of wp-config.php.
To turn testing mode on, the code is:
define('WP_DEBUG', true);To turn testing mode off, the code is:
define('WP_DEBUG', false);The capitalization of WP_DEBUG is important, the capitalization of true/false is not.
Turning debugging on will display any error messages on the page they occur, usually at the top of the page.
If you don't want to display errors, but want to log them to a file, the code is:
define('WP_DEBUG', true);
define('WP_DEBUG_LOG', true);
define('WP_DEBUG_DISPLAY', false);
This will save the errors to /wp-content/debug.log.
Make sure you save your changes.