I often use a Gravity Form connected to Stripe to take payment for things like web design jobs.
The problem is that the pricing on the form is static by default.
I need the same information from every web design client, but the price will change based on the size or scope of the job.
With dynamic pricing, I can send everyone to the same form, but change the value of the parameter so they see and pay the price that we've agreed upon.
Go through my tutorial on connecting Gravity Forms and Stripe first if you don't already have them setup.
How to add dynamic pricing to Gravity Forms with Stripe:
- Add a Product field to your Gravity Form.
- Set the Price to your most commonly used price.
- Under the Advanced tab in the Product field, check "Allow field to be populated dynamically".
- Put a parameter in the Price field.
- Save the form, add it to a page, then go to the custom URL.
The custom URL to change the pricing will be:
domain.com/page/?[parameter]=[price]Replace [parameter] with the parameter you set in the Price field.
Replace [price] with whatever you want the temporary price to be.
In my example, the parameter is "c" and the temporary price is $100, so I would do:
domain.com/page/?c=100My default price is $2,500 if someone goes to domain.com/page/.
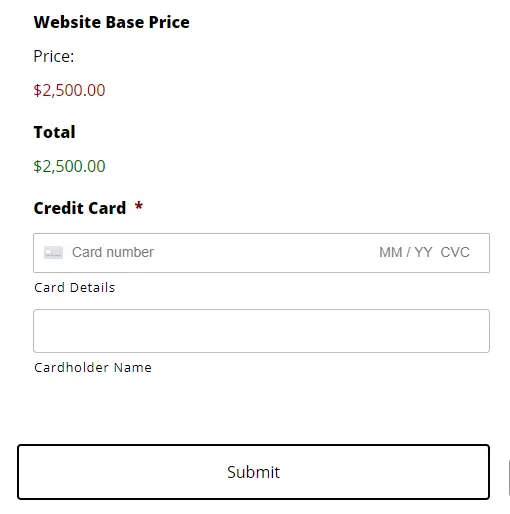
However, if someone goes to domain.com/page/?c=100 they will see a price of $100.
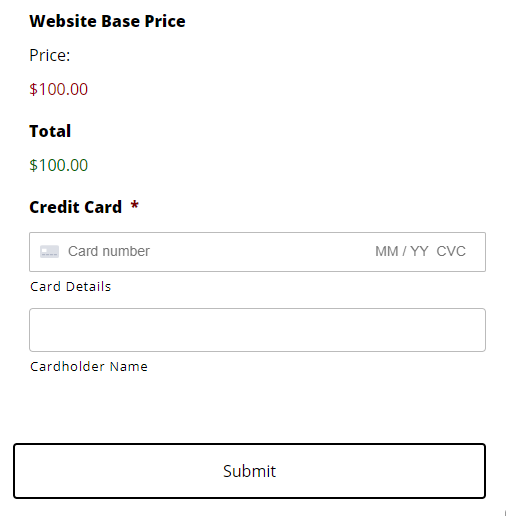
Assuming they fill out the form correctly, they will be charged $100, not the default $2500.
The question mark separates the URL of the page with the form and the parameters and variables.
If for some reason you need multiple parameters, you separate them with an ampersand, so it might be:
domain.com/page/?c=100&v=90Let's go through the details of how to set this up.
How to setup a dynamically priced product
I'm assuming you've already set up Gravity forms and Stripe. If not, see my tutorial on connecting Gravity Forms and Stripe.
I'm also assuming you have the rest of your form setup.
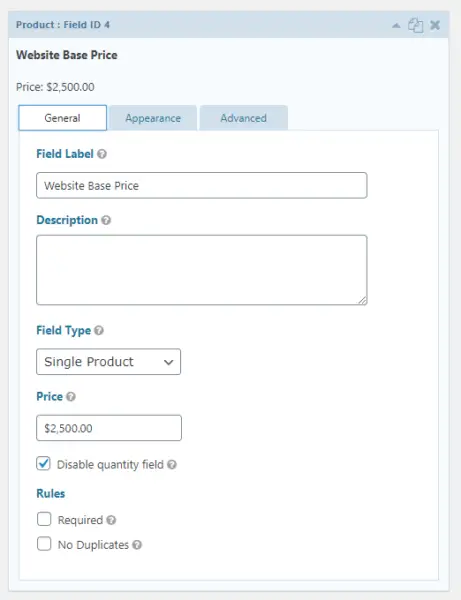
Add a Product field to the form from the Pricing Fields.
Set the Field Label and Description (optional).
Set the Field Type to "Single Product" and set the Price to your default price.
I usually also check "Disable quantity field" because I only want the customer to buy one of whatever it is.
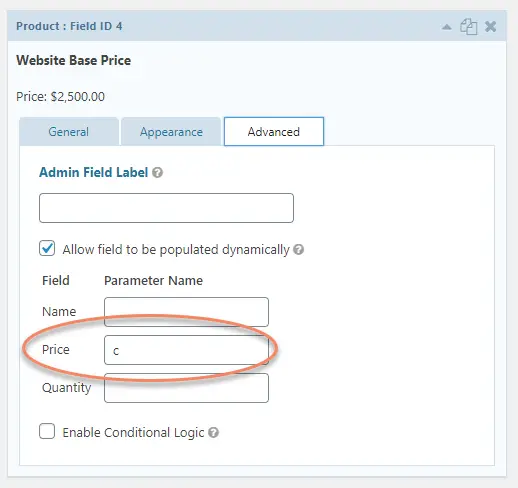
Go to the Advanced tab of the Product field.
Check "Allow field to be populated dynamically", which will make the list of fields and parameters visible.
Add your parameter in the input box next to "Price". In this example, I'm using the parameter "c".
Make sure to use something that is just lowercase letters without spaces. You could use underscores if you really needed to, but it's best to keep it as simple as possible.
That's all there is to it. Just make sure you add a Stripe Card field to the form and setup the Stripe feed.
You can use this method on either one time payments or ongoing ones. The only difference is whether you set the Stripe Feed to "Products and Services" for one time products or to "Subscription" for ongoing variable pricing.
Take it to the next level with redirects
If you have a few price points that you always use, or you just want to set it up and forget it, you might want to setup some redirects.
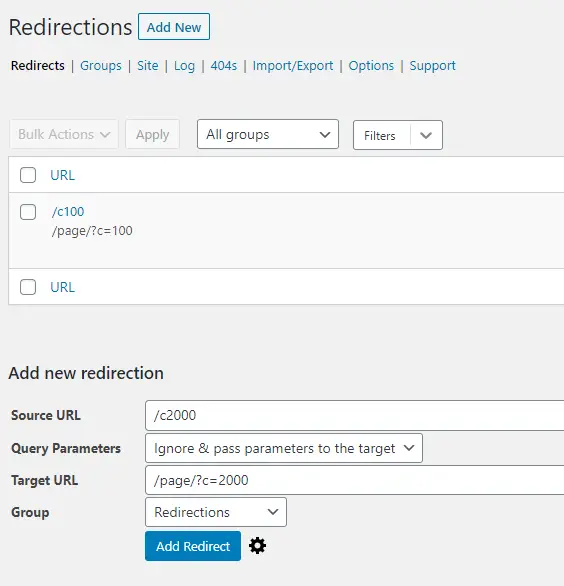
Add and activate the Redirection plugin from the WordPress Repository.
Set the source URL to something you'll remember. In this case I'm using /c100 where 100 is the price that will display.
Set the Target URL to the format you configured, then hit Add Redirect.
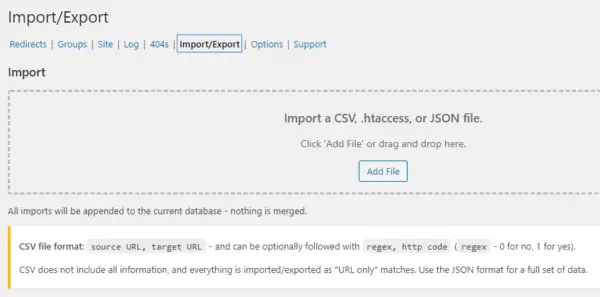
You can also setup a CSV with all the source URLs in the first column and their matching target URLs in the second column, then import them all into Redirection.
Please comment below if you found this tutorial helpful or if you have any questions about any of it.