The basic setup of most WordPress websites is:
- A Domain registered at somewhere like GoDaddy or Namecheap
- Hosting at somewhere like WPEngine or Hostgator
- WordPress installed on the hosting
There are two main ways of connecting the domain and the hosting. You could:
- Set the A Record at the domain registrar to point to the hosting IP address, or
- Set the nameservers at the domain registrar to that of the hosting account
I'll just cover the first in this tutorial.
How to add an A Record to a domain:
- Log in to your domain registrar
- Look for the domain you want to connect
- Go to the manage DNS area
- Add a record of type "A" with the IP address of your hosting
- Be sure to save the record
If you want to point the main domain at the hosting, there is probably already an A Record for "@" setup. The "@" means the main domain.
If you want to point a subdomain at the hosting account, you would add an A Record for that subdomain.
In these examples, I'm assuming you want yourdomain.com and www.yourdomain.com to point to your hosting as that's the most common reason for doing this.
Each registrar does it slightly differently. Below are walkthroughs of some of the more common registrars. Click the links below to jump to that section:
When you're finished, go to the What's Next section for figuring out when the update has worked.
Add an A Record to GoDaddy
Let's point yourdomain.com and www.yourdomain.com to your hosting account from GoDaddy.
Log into GoDaddy and find your domain.
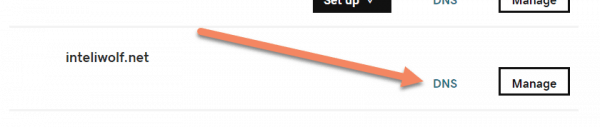
If you're in the My Products section, click "DNS" next to your domain.
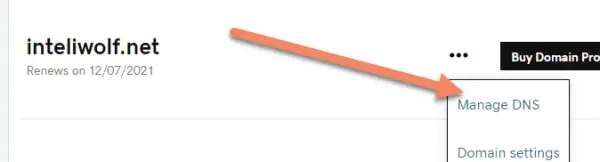
If you're in the My Domains section, click the three dots, then click "Manage DNS".
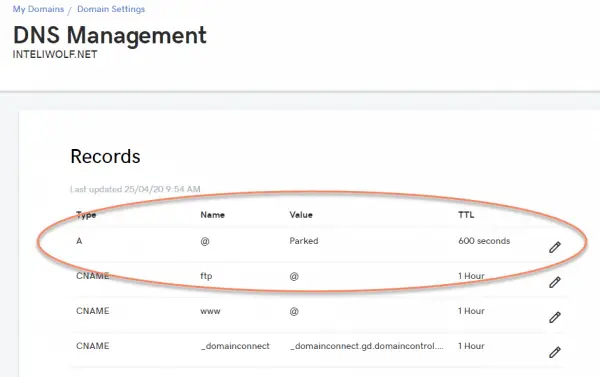
Whichever path you took, you'll end up at the DNS Managment page.
You'll probably see an A record for "@" (which is the root of the domain) pointing to "Parked".
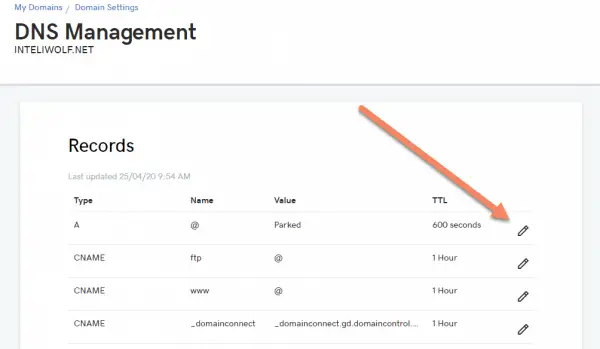
Click the pencil icon next to the A Record you want to edit.
Look for "Points to".
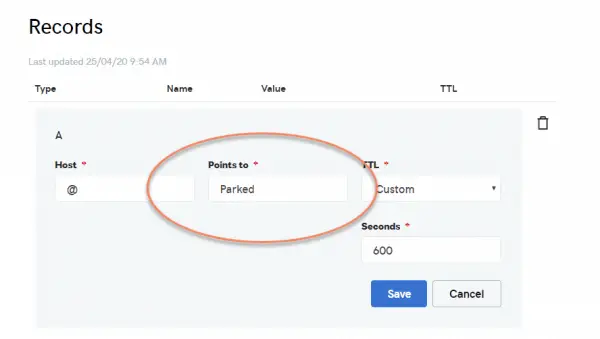
Change "Points to" to the IP address of your host. You should have received that in an email when you setup the hosting. The IP address will be a set of four numbers, separated by periods, but with no period at the end.
Be sure to click "Save".
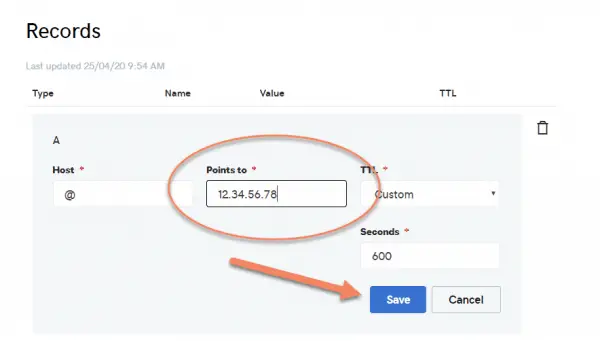
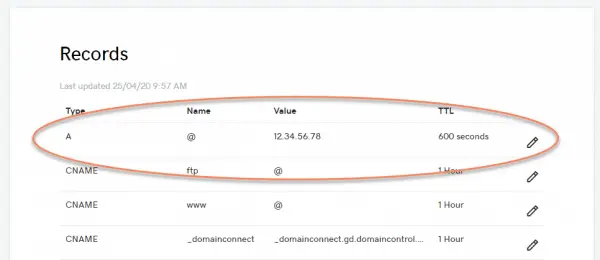
That should be all you need to do at GoDaddy to point the A Record to your host.
Add an A Record to Namecheap
Let's set the A Record at Namecheap to point to your domain. The end result we want is for yourdomain.com and www.yourdomain.com to point to your hosting account.
Log in to Namecheap, find your domain, then click "Manage".

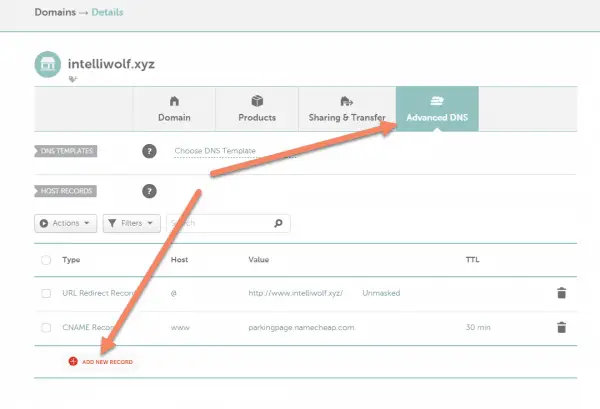
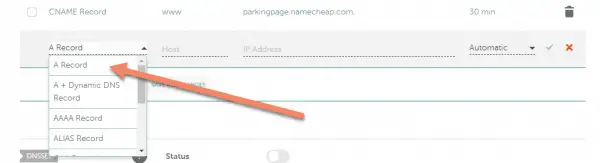
Go over to the Advanced DNS tab and click "Add New Record".
Choose "A Record", if it's not already selected.
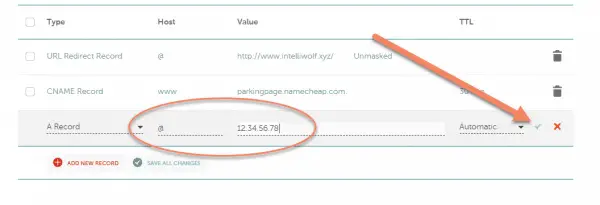
Set the Host to "@" and the Value to the IP address of your host.
You should have received the IP address when you setup the hosting account.
Leave the TTL ("Time To Live") as the default.
Be sure to click the check mark to save the record
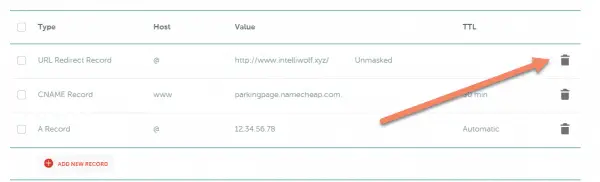
Now we need to get rid of Namecheap's default parking records. I'm assuming your have a URL Redirect Record for @ pointing to the www subdomain of your site and a CNAME record for the www to parkingpage.namecheap.com.
If you have a different setup here, make sure you note down what's there and only proceed if you understand the setup.
Click the trash icon next to the URL Redirect.
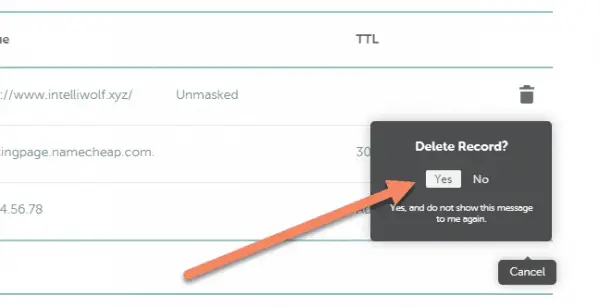
Click "Yes" to confirm deletion.
Next to the CNAME record for www, click the entry in the value column to edit it.
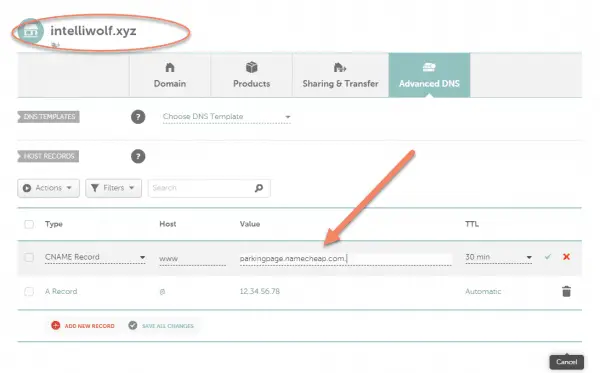
Change the value to whatever your domain is.
Click the check mark to save the record.
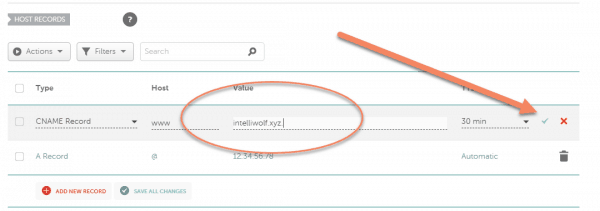
Your setup should look something like this, with a CNAME record for www pointing to your domain and an A Record for @ pointing to your hosting IP address.

What's next?
When you're finished, use a DNS Propagation check to see whether the record has updated.
"Propagation" means to update all the records across the internet so that when someone types in your domain, the host is shown.
It can take up to 48 hours to fully propagate, but I find it's usually about an hour.