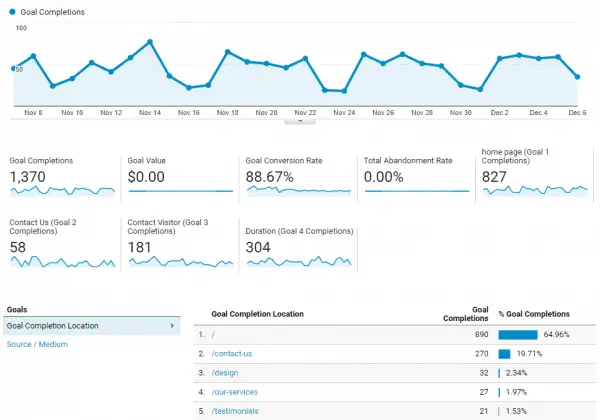
If you have a contact form on your website and you use Google Analytics, it's a great idea to track conversions.
You already know how many people are contacting you, but on what page are they filling out the contact form? How did they get to that page? Did they get to your website from the search engines, paid advertising or social media?
These insights are invaluable to a business. You can use them to improve your marketing. If you roll out a design change, you can see exactly where it improved your bottom line. You can see if a particular Facebook promotion was worthwhile doing.
This is an example from one of my websites:
I use Contact Form 7 on many of my websites. It's easily the most popular contact form plugin on WordPress, with over 5,000,000 active installs.
There are other guides on how to connect Contact Form 7 with Google Analytics conversion tracking, but they all use the old deprecated on_sent_ok code that was removed in 2018.
You might have tried to use:
on_sent_ok: "ga( 'send', 'event', 'Contact Form', 'submit' );"And seen this screen:
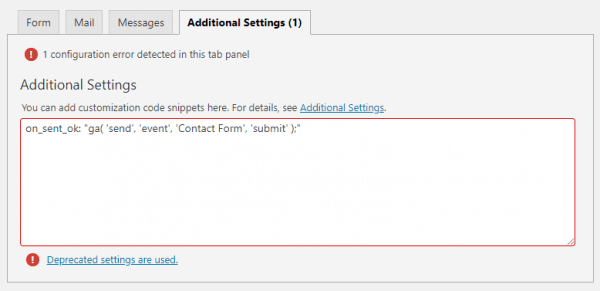
If you try to put the on_sent_ok code into the Additional Settings tab, you'll get a notice that "1 configuration error detected in this tab panel" and "Deprecated settings are used".
Let's go through the correct way to connect Contact Form 7 and Google Analytics.
How To Add Google Analytics Conversion Tracking To Contact Form 7
- Create a New Goal in Google Analytics
- Add a JavaScript event listener, with the parameters from the goal, to the footer of every page with the contact form.
If you just want the JavaScript event listener code, it is:
<script type='text/javascript'>
  document.addEventListener('wpcf7mailsent', function(event) {
    ga('send', 'event', 'Forms', 'submit', 'Contact Form');
  }, false );
</script>
Let's go through these steps in detail.
Create a New Goal in Google Analytics
I'm assuming you already have your website setup in Google Analytics and the tracking code installed on your website.
Go into the Google Analytics Dashboard and find your website if you have more than one.
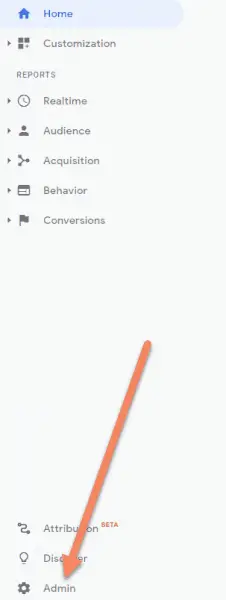
On the bottom right corner, look for the Admin link or just the gears icon. Click that.
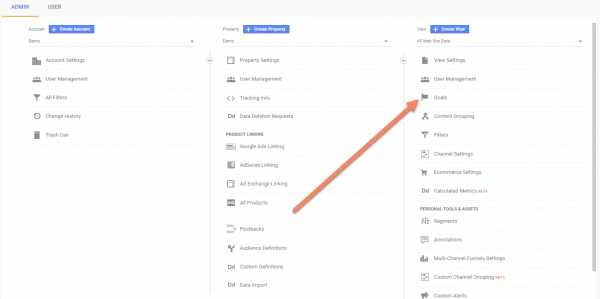
In the Admin area, click "Goals" in the third column.
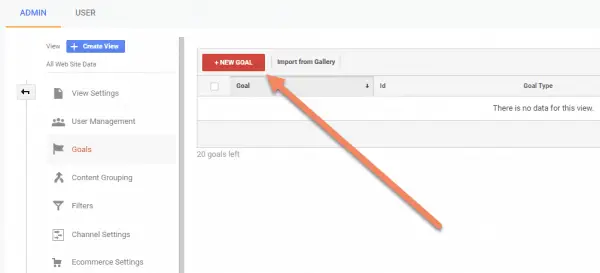
Click "New Goal".
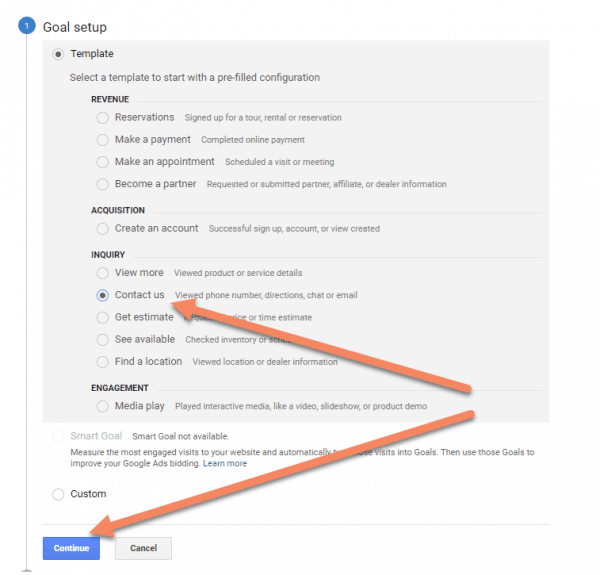
Select the Contact us template, then click "Continue".
Choose the Event type and click "Continue".
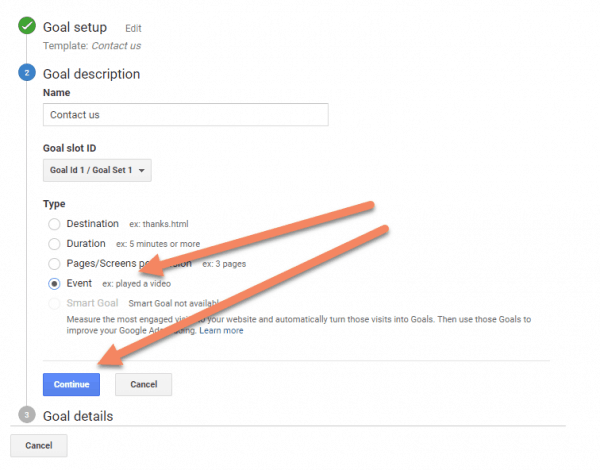
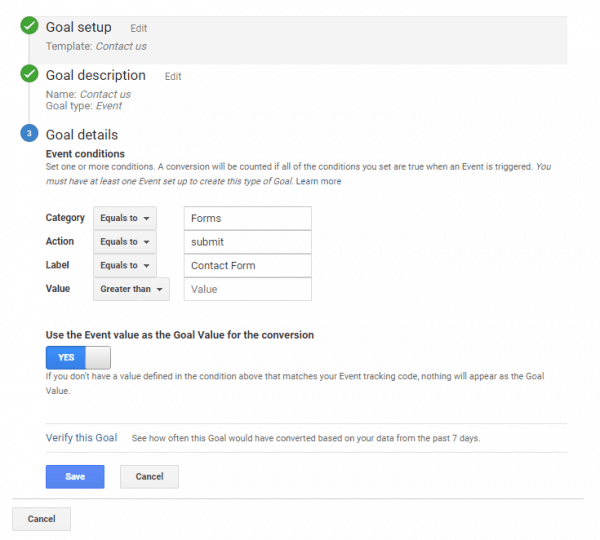
Add a category and action. A label too if you like.
Action should be "submit". The category and label should be something obvious to you.
If you don't have any other goals setup, just do:
- Category: Forms
- Action: submit
- Label: Contact Form
Remember these values, as you'll need them when we setup the listener.
If you know the average value of a contact, you can add that into value.
Click "Save".
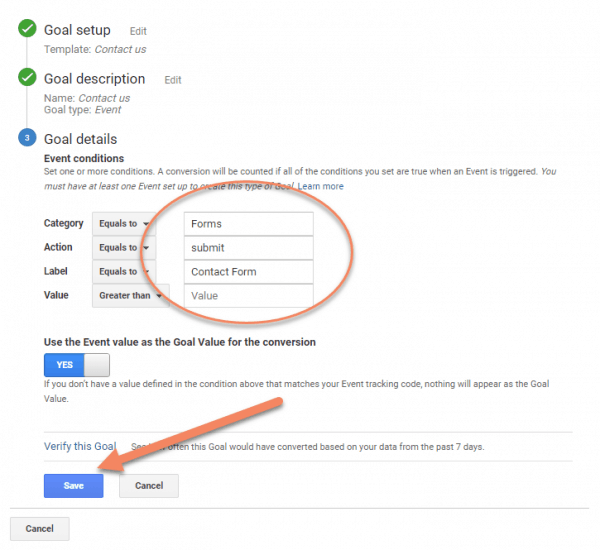
That's all you need from Google Analytics.
Add a JavaScript Event Listener
In your website, we need to add a snippet of JavaScript that tells Google Analytics when the contact form has been submitted.
This code goes in the footer of the website. If you have a footer.php file in your child theme, you could hard code it in there.
The code is:
<script type='text/javascript'>
  document.addEventListener('wpcf7mailsent', function(event) {
    ga('send', 'event', 'Forms', 'submit', 'Contact Form');
  }, false );
</script>
Different themes will implement scripts differently. With some, you can add it in the Customizer or use a plugin like SOGO.
If you're using a Child Theme (see this tutorial if you don't have one installed), adding the code to functions.php will always work, unless you have a poorly designed theme that doesn't call wp_footer().
Add this code to your functions.php file:
add_action('wp_footer', 'ga_cf7_conversion_tracker');

function ga_cf7_conversion_tracker() {
  echo "
  <script type='text/javascript'>
    document.addEventListener('wpcf7mailsent', function(event) {
      ga('send', 'event', 'Forms', 'submit', 'Contact Form');
    }, false );
  </script>";
}
In this line:
ga('send', 'event', 'Forms', 'submit', 'Contact Form');Be sure to swap 'Forms', 'submit' and 'Contact Form' with what you setup in the Goal Details (scroll to this section if you forgot what you setup).
This code will add the listener to every page.
If you don't have a contact form on every page, there's no need to add the event listener to every page. Instead, you might use this code:
add_action('wp_footer', 'ga_cf7_conversion_tracker');

function ga_cf7_conversion_tracker() {
  if (is_page(123)) {
    echo "
    <script type='text/javascript'>
      document.addEventListener('wpcf7mailsent', function(event) {
        ga('send', 'event', 'Forms', 'submit', 'Contact Form');
      }, false );
    </script>";
  }
}
In the line:
if (is_page(123)) {Make sure you change the number 123 for the page ID of your contact page.
You can find the page ID by editing the contact page, and looking in the URL for post=123, where "123" will be the ID.
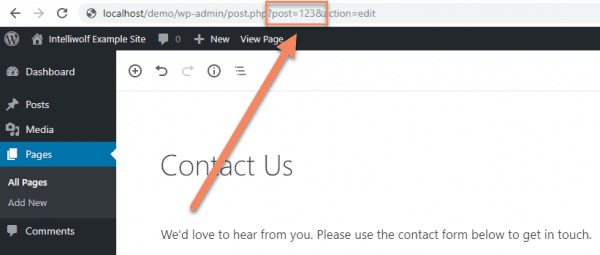
If you have a contact form on a couple of pages, you'd change the line to:
if (is_page(array(123, 456, 789))) {That will display the event listener just on those pages. Just substitute those numbers for the IDs of your pages. Don't use quotation marks around them.
How to find Goal Details
If you've forgotten what you put into the Goal Details, go back to Google Analytics -> Admin -> Goals.
Click on the goal you setup earlier.

Next to Goal details click "Edit".
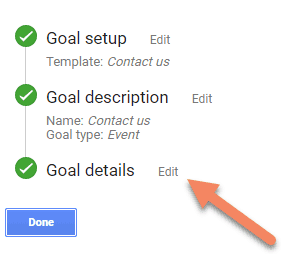
You'll see the Category, Action and Label that you setup before.
When you're finished, just click "Cancel".
