Every web developer should be able to use FTP to edit files.
FTP stands for "File Transfer Protocol". As the name suggests, it's a way of transferring files between servers, or between a server and your computer.
You may be familiar with HTTP, which stands for "HyperText Transfer Protocol". That's how you're reading this page right now.
To use HTTP, you need a piece of software called a browser. In the same way, we need a piece of software called an "FTP Client" to use FTP. There are other ways to use FTP, but for simplicity's sake, we'll just stick to using an FTP Client.
I prefer to use FileZilla to transfer files, but there are other programs, like CuteFTP, which are also good.
If you want to know how to edit files through cPanel's file manager, I wrote a tutorial on that here.
How to edit files through FTP:
- Install an FTP program like FileZilla
- Enter your FTP details and login
- Edit the files in a text editor
- Save and upload to the server.
Let's go through those steps in detail.
Go to the last section if you need to find your FTP credentials.
Install an FTP Program
Everyone has their preferred FTP programs, but I like using FileZilla. It's free, open source, cross-platform, actively maintained and has been around for years.
Go to FileZilla Project and download the version that matches your operating system.
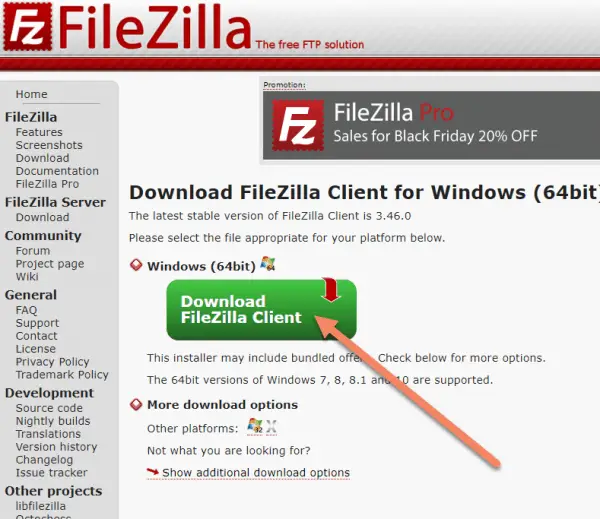
You only need the regular version of FileZilla Client for what we're doing today.
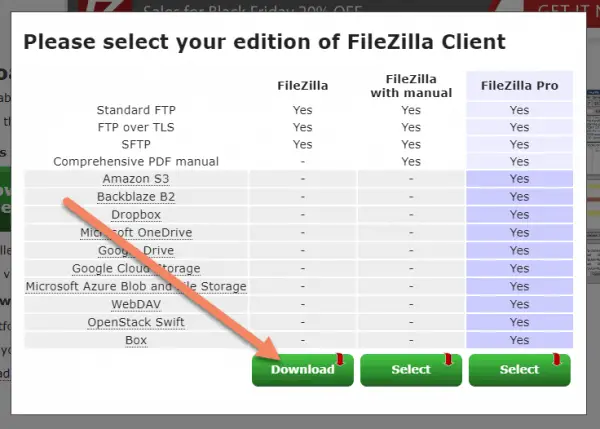
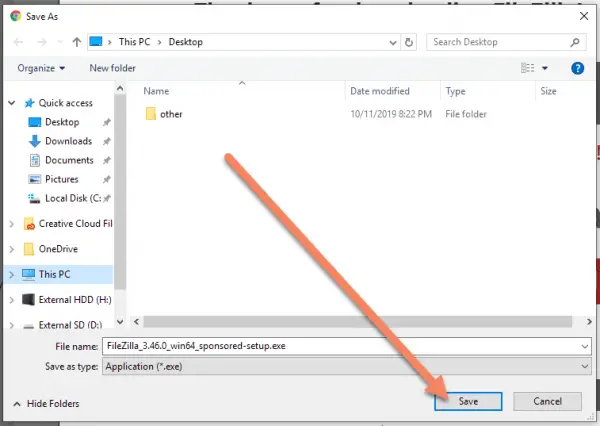
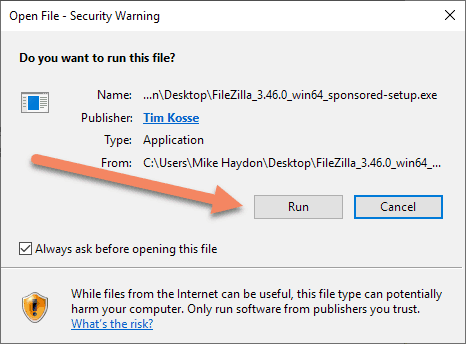
Be sure to save the .exe file somewhere you'll remember.
Open the file.
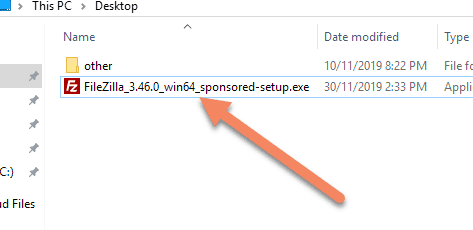
Click "Run" if necessary.
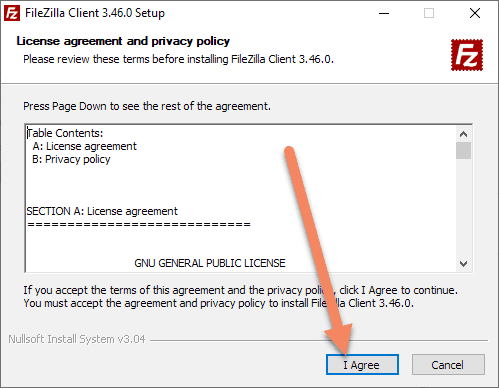
You'll have to agree to the GNU license.
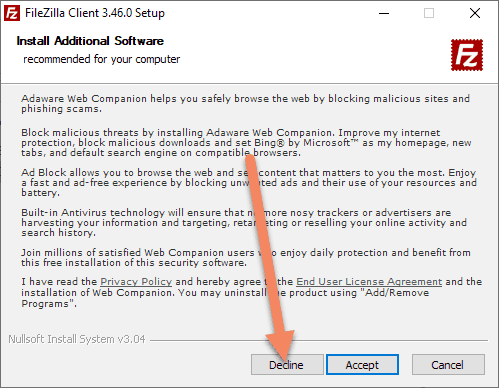
Be careful with the next few steps - to keep the software free, they include prompts to download other software. Just decline them (unless you really want them).
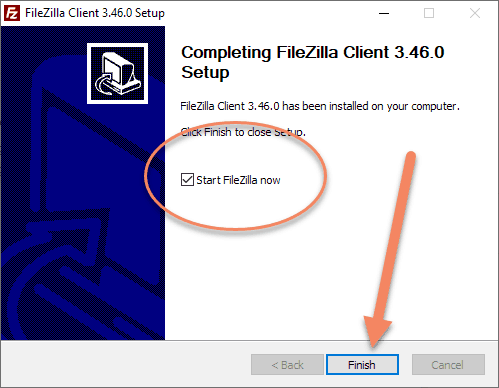
FileZilla will finish installing. "Start FileZilla now" should be checked. Click "Finish" and FileZilla will open.
Enter your FTP details
Scroll down to the section on how to find your FTP credentials if you don't already know them.
In many cases, the host will just be ftp.yourwebsite.com. Your FTP username and password will often be the same as the cPanel username and password.
At the top left of the icon bar in FileZilla, just underneath File, there should be an icon of a server. Click that.
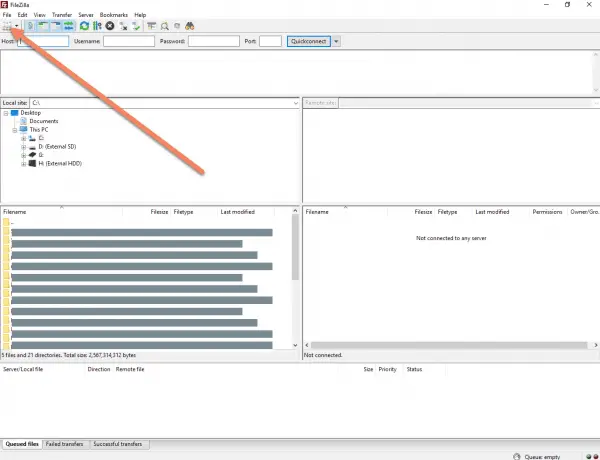
You'll see a dialogue listing all the websites whose logins you have saved. This will be empty if it's the first time you've used FileZilla.
Let's add your website to the list by clicking "New site".
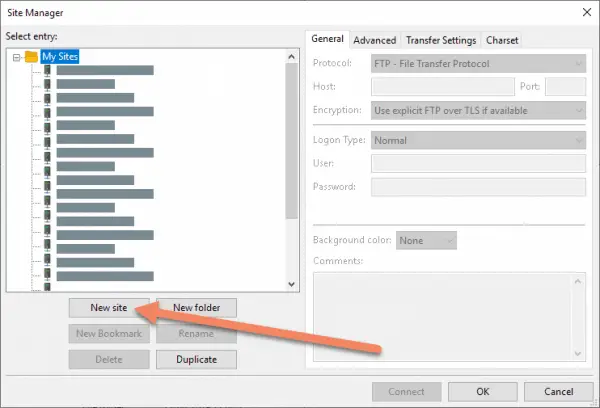
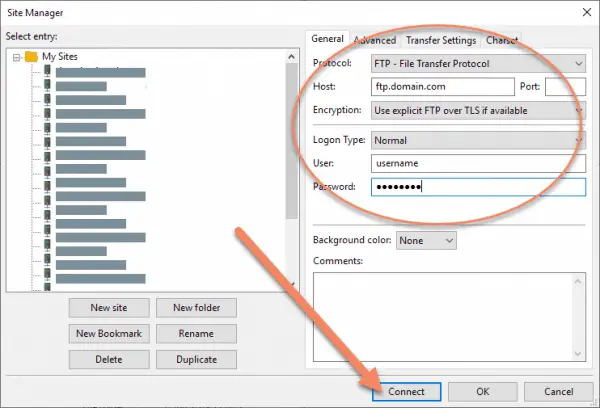
Enter your details with the options as shown.
If you're using Port 21, just leave the Port field blank. If you don't know what I'm talking about, just leave it blank. Port 21 is the default FTP port.
You generally want to use the "Normal" logon type. Enter your username and password, then click "Connect".
If all goes well, after a few seconds connecting, you should see the files and folders on the server.
Edit the files on the server
There are a few ways that a server could be setup and you could enter at one of a few points. It will be the same for you every time, but it might be different from the setup I'm showing. Mine is a pretty typical setup.
Before you make any changes, be sure to take a backup.
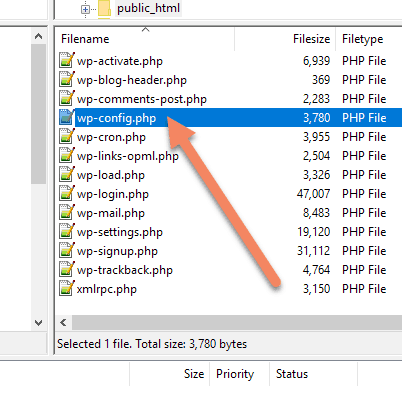
To get to your public files, you may need to double click on the public_html folder.
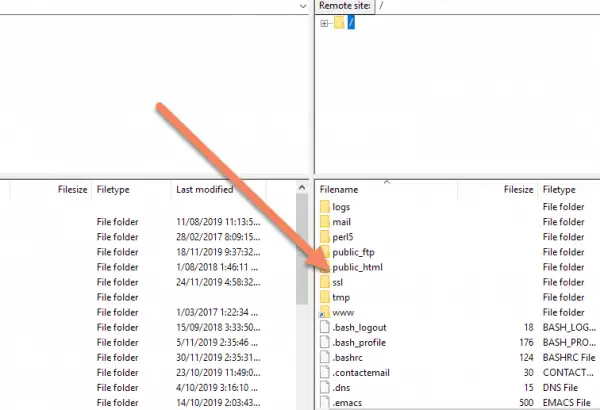
Assuming you're running WordPress, you should see all your WordPress files and folders at this point.
For this tutorial, we'll edit the wp-config.php file. Right-click the file.
If you double-click it, the file will start downloading to your computer.
Click "View/Edit" to open the file in your default text editor.
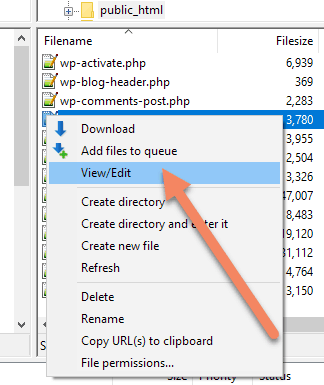
If you're on Windows and haven't changed the default text editor, the file will open in Notepad or Wordpad.
If you're doing a bit of web development, I recommend you get Notepad++ for free and set it up as your default text editor. That's what I'm using in this tutorial. Life's too short to not have automatic code highlighting.
In this tutorial, we're going to turn on WordPress debugging.
Find the line at the bottom of wp-config.php that defines "WP_DEBUG".
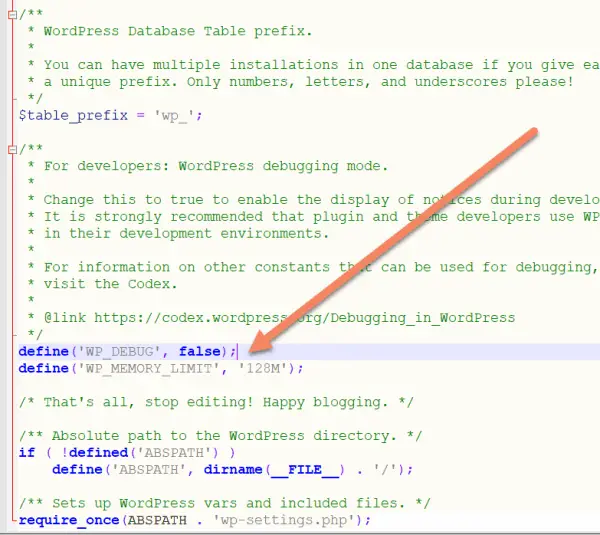
Change false to true, so that the line now reads:
define('WP_DEBUG', true);The spacing around the parentheses is not important.
Save and upload the file
Save the file in your text editor (File->Save or CTRL+S).
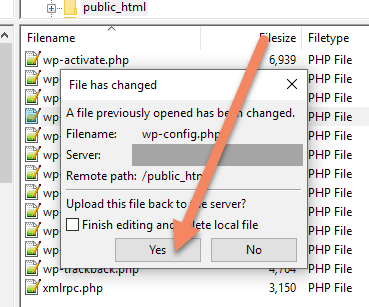
Click on FileZilla to make it the active window. After a few seconds, you should see a popup that a file has changed.
Check that the Filename is what you're expecting (in this case it's wp-config.php), then click "Yes" to upload the file back to the server and overwrite what's there.
How to find your FTP credentials
When your server was first setup, you should have received an email that included how to connect via FTP. If you've lost that, or can't be bothered digging it out, that's fine. There's an easy way to get them from the server.
How to find your FTP credentials:
- Login to cPanel
- Navigate to FTP Accounts
- Scroll to the bottom and find what looks like the main FTP account
- Click "Configure FTP Client" to reveal the FTP credentials.
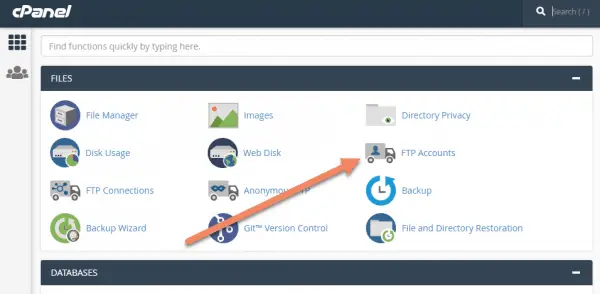
Once you've logged into your cPanel, look for FTP Accounts. It should be in the Files section. Click it.
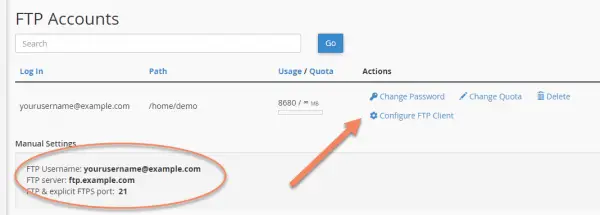
At the bottom, either under FTP Accounts or Special FTP Accounts, you'll see a list of accounts. There should be one that looks like the main FTP account. It may be in the name of your cPanel username.
When you click "Configure FTP Client", you'll see your FTP credentials.
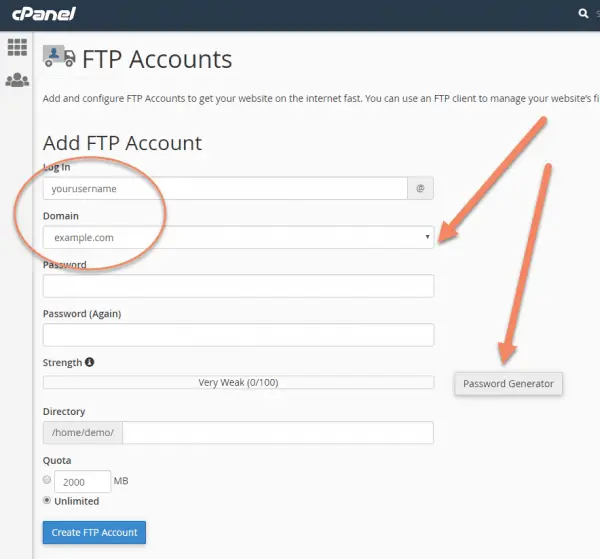
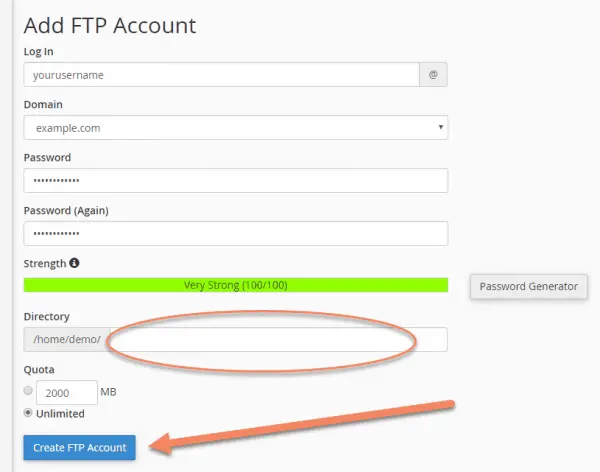
If you want to setup a new FTP account, perhaps to give someone else access without giving away your cPanel login, scroll back to the top of that page.
Enter the new username under Log In.
Choose the domain from the dropdown, if you have multiple domains connected to that cPanel.
Next, click the "Password Generator".
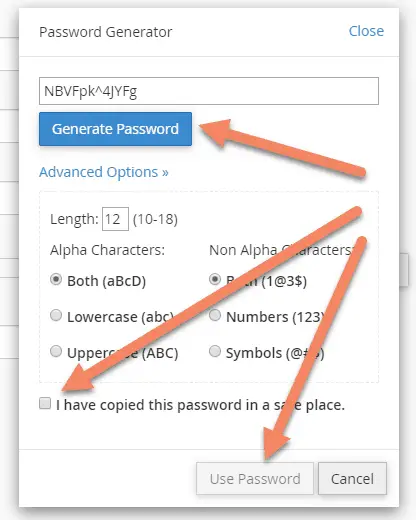
You'll get a popup with the password. I like to replace any characters like lowercase L, Uppercase o, zero and one. These characters cause problems if you email the credentials to someone as it can be difficult to figure out which is which.
Copy the password to where you store passwords (I use Roboform for this).
Click "I have copied this password in a safe place", then click "Use Password".
The password will be automatically filled in.
Be sure the Directory is where you want this FTP account to be able to access. If in doubt, delete anything in this field.
Click "Create FTP Account" to create the FTP account.
Use these newly created credentials as part of the rest of this tutorial for transferring files with FTP.

